Automatic Indexing Software
Fully automate the process of indexing scanned files or electronic documents with SimpleIndex. Our automatic indexing software uses complex OCR, bar code recognition, and pattern matching to identify relevant index data automatically. Command line interface and unattended server processing enable full automation.

Learn More About SimpleIndex
Automatic Image Splitting
Speed up scanning of multi-page layouts and spreads with SimpleIndex’s built-in tools
Magazines, pamphlets, booklets and similar documents can be a scanning headache, particularly when you want to capture each page, or even each block of text, as its own separate file. Splitting the pages and cropping each one to its final format adds hours and tedium to an already laborious scanning process. Fortunately, SimpleIndex has built-in tools to simplify these tasks. Horizontal and vertical splitting, magazine scanning and repeatable cropping of multiple zones per page save you hundreds of clicks per scanning session, creating time for more important tasks.
Multi-crop: Set and forget page breakdown
There are times when you need to capture more granular contents than just an image of a page. For example, you may need to separate out the images, illustrations, ads and body text of a publication. The crop tool in SimpleIndex allows you to draw zones around each section of a page and create a discrete file from each one when you click Save Index. What’s more, if you have a series of pages with identical layouts, then there’s no need to redraw the zones, fly through them all with a click of Save Index and you’re done.
Split pages horizontally or vertically

Pages with a 2-up layout, either side-by-side or top-to-bottom, can be automatically split into separate files. When setting up a SimpleIndex job, the Advanced Scanner Settings panel allow you to choose Split Pages Vertically to split left-side and right-side images, or Split Pages Horizontally to split top and bottom images.
Magazine Scan
Magazines and other types of spread layouts – items with staples in the center typically – pose an interesting scanning challenge. When separated to the individual sheets, you find the pages out of order. For example, an 8-page booklet will be printed on 4 sheets and the first sheet will have pages 1 and 8 on one side and pages 2 and 7 on the other. The Magazine Scan feature not only performs a split as discussed above but reorganizes the pages to their correct order.


Learn More:


Convert Email to PDF

Import documents from email attachments or archive your email by converting messages to PDF automatically using SimpleIndex.
Once converted to PDF, employ the power of SimpleIndex‘s automatic document separation, OCR, barcode recognition, and PDF text parsing capabilities to organize them into files automatically and upload them to your document management system, SQL database, or cloud storage provider.
Automate Document and Data Capture
We’ve seen so many cases where users download email attachments, open them in Acrobat, separate them into individual documents manually, before finally processing them with their data capture software.
The most common case for this is with invoice processing, since most vendors now send PDF files that have all of the latest invoices in a batch.
SimpleIndex can fully automate this process, downloading the messages and attachment, converting them to PDF in a single step. This can be used with SimpleIndex data capture functions for a complete solution, or as a front-end to an existing enterprise data capture solution that doesn’t support these features.
Use Cloud Storage for Email Archival

Many document management systems have built-in email archival solutions designed to create an official record of all correspondence that can be used to meet records keeping regulations or searching across user inboxes.
Instead of traditional DMS, many companies are choosing to use cloud storage providers like Google Drive, Box, and SharePoint as their primary repository for documents. And enterprise SimpleIndex makes it easy to archive email to cloud storage by converting message bodies and attachments to PDF files, organizing them automatically into logical folders and filenames, and saving them directly to your cloud storage drive.
Archive Only What You Want
Configure pattern matching rules using keyword lists and regular expressions to identify relevant documents targeted for archival and ignore the rest.
Fully Automated and Unattended Processing
With the SimpleIndex Server, email processing can run fully unattended to PDF convert and save your emails automatically. Just set it and forget it!
Email Protocols and Authentication
Email import currently supports direct import from any IMAP-enabled Inbox (supported by most email providers). If your project requires any other email protocol, authentication scheme, Graph API, 2-factor, etc. these can be quickly added by our developers.
Learn More:
KB Articles for SharePoint document scanning
- How to connect to a SharePoint Online site that uses multi-factor authentication
- Reset SharePoint Login Information
- How to Fix SharePoint Login Issues
- Troubleshooting SharePoint Permissions Issues
- SharePoint Managed Metadata
- Can SimpleIndex integrate with Microsoft SharePoint?
- Front End Scanning, OCR Scanning, Scanning Software, SharePoint Migration, SharePoint Scanning
SimpleIndex 10.1 with Textract!

SimpleIndex 10.1 is now available, and it adds a huge new feature — Amazon Textract!
The Cloud OCR License adds the Amazon AWS Textract Cloud OCR engine to SimpleIndex, unlocking a bunch of great new capabilities:
- The highest OCR accuracy of any available engine, using Amazon’s massive machine learning model
- Handprint recognition, including unconstrained and cursive writing
- Automatic form field extraction
- Accounts Payable Invoices and Receipts extraction
- Pay-as-you-go licensing
The form field extraction feature is pretty amazing. It locates any labeled field on the page and its corresponding value regardless of the page layout, even if the value is handwritten. It makes SimpleIndex able to do jobs that once required enterprise data capture software like Kofax, AnyDoc, or ReadSoft, but at a fraction of the price!
SimpleIndex works with your existing AWS account. For standard OCR it costs about $0.01 per page, for invoices and forms it is about $0.065 per page. This price can vary by region.
- Published in Release Notes
Exclude Index Field from Index Log
Please refer to the Wiki Documentation for the complete Index & Batch Logging reference.
Many times when outputting a Log file via CSV, XML, TXT, etc. there will be index fields that are required in the Job Configuration, but not desired to be output in the Index Log. In those cases those fields can be excluded from the Index Log with a “~” character at the end of the Index Field Name.
To do this go into the Job Options/Job Settings Wizard, go to the Index tab/step, find the Index field that you want to exclude from the Index Log and add this to the end of the field name: ~
EX. The original Index Name is “OCR Text” and that field should be excluded from the Index Log, so it doesn’t appear. This field should be changed to “OCR Text~”.
Turn Off Prompts and Pop Ups on Job Configurations
Please refer to the Wiki Documentation for the complete Job Configuration Interface reference.
SimpleIndex has a variety of prompts and pop ups that must be clicked that come up by default. These are normally needed by most users to set certain options or perform certain tasks based on the Job Configuration settings that have been set-up. These can be forced to be turned off though with a command line script. This can be configured in the settings for a shortcut that points to the Job Configuration that you would like to suppress the prompts and pop ups on.
Instructions to set Job Configuration shortcut to suppress all prompts and pop-ups:
- Right click on the Job Configuration file and select “Create shortcut” or “Sent to>Desktop”
- Find the shortcut, Right click on the shortcut and select “Properties”
- In the “Target:” field change the text in the field.
- Here is an example of the original text in the “Target:” field of a Job Configuration shortcut: “C:\SimpleIndex\Scan and OCR.sic”
- Here is what this section would be changed to for suppressing the prompts:
“C:\Program Files (x86)\SimpleIndex\SimpleIndex.exe” /c:”C:\SimpleIndex\Scan and OCR.sic” /s - The “/s” in this example is the command to suppress prompts and pop ups in SimpleIndex.
- The path to the Job Configuration file that you want to use will need to be set to the proper destination and filename, including file type extension.
Change the Font Size of Index Fields
Please refer to the Wiki Documentation for the complete Index Fields reference.
Index fields have a default 8 point font size, but this can be changed if required for visibility. You can change this by editing a registry file in the Registry Editor and set any font size you would like.
To make this change follow these instructions
- Close out of SimpleIndex entirely
- Open the Windows Registry by going to the Windows Search and searching for “RegEdit”
- Go to this location in the Registry Folder Tree: Computer\HKEY_LOCAL_MACHINE\SOFTWARE\WOW6432Node\SimpleIndex\Misc
- In this window you will see a key called “IndexFontSize”.
- Open this file and change the value to the font size you would like and then click OK.
- Close and reopen SimpleIndex to see the change in effect.
Export Issues and Missing Images after Export
Please refer to the Wiki Documentation for the complete Export Settings reference.
If you are having issues with the files not exporting properly or you have missing images in the export folder that should have been saved, then a registry key needs to be added to correct this. This registry key changes the export process from the faster process that SimpleIndex uses by default, to a slower export process that will avoid these issues.
Instructions:
1. Search for
“regedit” on your computer.
2. Navigate to this
folder in the Registry Editor window:
Computer\HKEY_LOCAL_MACHINE\SOFTWARE\WOW6432Node\SimpleIndex\Misc
3. In the right
pane of the Registry Editor window Right Click and select New>String Value
4. Set the name of
the file to this: EnableAtalaExport
5. Double click on
the “EnableAtalaExport” registry key, set the Value to “0”
(Zero) and click OK.
FastImport to Disable Automatic Processing During Import
Please refer to the Wiki Documentation for the complete Fast Import Interface reference.
SimpleIndex has a variety of processing functions that automatically happen behind the scenes when importing documents to improve the quality and functionality of the images and processing capabilities of the software.
On some occasions these extra processing functions cause delays and conflicts or aren’t needed at all. If these processing functions are causing SimpleIndex to crash or slow down the import processing too much for a particular Job Configuration that can be turned off with a registry setting.
Follow these instructions to add this registry setting:
- Close out of SimpleIndex entirely
- Open the Windows Registry by going to the Windows Search and searching for “RegEdit”
- Go to this location in the Registry Folder Tree: Computer\HKEY_LOCAL_MACHINE\SOFTWARE\WOW6432Node\SimpleIndex\Misc
- In the right section of the Registry window Right Click in the white space and select New>String Value
- Name the new key “FastImport”
- Open the “FastImport” Registry Key, set the value to “1” and then click OK
Large Documents (>500 pages) are Slow to Process
When working with PDF image files containing a high number of pages (typically in excess of 500, but can vary by file and PC running the job) SimpleIndex may run into performance issues as it attempts to hold all of those pages in memory and perform the requested operations (full-text OCR in particular can tax a system in these circumstances).
SimpleIndex 11:
Use the Fast Import and Fast Export options to use our new, optimized import and export that can split or merge PDF files with thousands of pages in a matter of seconds. These options disable the optional features that require the slower import and export operations and allow for much faster processing.
Older Versions of SimpleIndex:
A workaround in this scenario is to convert the large PDF to a folder of smaller PDFs files that can be managed more easily. In order to minimize the impact on production and tax the user(s) with extra steps, you can use a third-party splitting tool that can be called from the Command Line. One such option that has worked well is PDFSplitter from CoolUtils
One way to automate this process is to use PDFSplitter’s command line ability in conjunction with SimpleIndex’s Pre-processing function. For simplicity let’s consider a 600 page PDF with a filename generated at the time of scanning using indexes provided on a coversheet or keyed by an operator. The goal now is to take that large file and perform a full-text conversion on it.
Our SimpleIndex job, Full Page OCR.sic let’s say, launches and before getting to work calls PDFSplitter from the Pre-processing step with a command such as
PDFSplitter.exe “C:\Images\Smith – John – Medical History.pdf” C:\Images\Pages\ -cp 100
PDFSplitter will run and break that document every 100 pages creating 6 PDFs in the folder C:\Images\Pages. It maintains the original filename, simply adding “001-100” and so on to the name. After PDFSplitter is complete the Full Page OCR job begins its process and, given that the original filename is still part of the split files’ naming schema, it can produce one full-text PDF in the final output folder.
Related Wiki Help Pages:
How to activate SimpleView?
Please refer to the Wiki Documentation for the complete SimpleView Application reference.
Activation Instructions
SimpleView Option A – New SimpleIndex Installation:
If you are installing SimpleView on the Windows computer for the first time first download SimpleIndex from the SimpleIndex Demo Installation Link.Once the SimpleIndex software has been downloaded install the software from the downloaded installation file.

During the installation process you will be asked to enter your Serial Code or Serial Codes.
Single Serial Code:

Multiple Serial Codes (separate with a comma):

After you have entered your Serial Code(s) click Next to move through the installation process.
Once the installation is complete you will receive the following Window:

SimpleView Option B – SimpleView Already Installed:
If you have already installed the SimpleView software then all you need to do is Activate the demo.
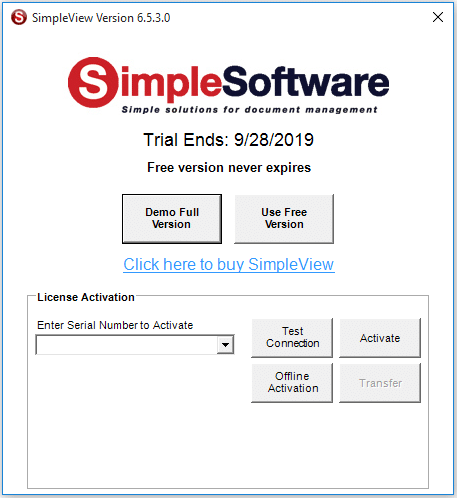
Click the SimpleView icon from the SimpleIndex software or from your Windows Start menu.

Enter your Serial Number into the “Enter Serial Number to Activate” field in the Activation Window.

Click the Activate button to activate the license.

You will receive a confirmation that the license was properly activated and your license type will be displayed next to the “License Type:” section of the Activation Window.
SimpleView Option C – SimpleView Installed on Computer Not Connected to the Internet:
If you would like to install SimpleView on a computer that doesn’t have an internet connection an Offline Activation will need to be done.
First fully install the SimpleView software without activation.
Click the SimpleView icon from the SimpleIndex software or from your Windows Start menu.
Enter your Serial Number into the “Enter Serial Number to Activate” field in the Activation Window.
Click the “Offline Activation” button.

Click OK in the “SimpleView Offline Activation” window, which asks you to call or email for an Offline Activation.

Select the license version that you ordered in the “SimpleView Version” drop down.
Then either call (865) 637-8986 option 2 or email support@simpleindex.com with the Authorization Request Code. We will the provide you with the Activation Key.
Enter the Activation Key and then click the Offline Activation button.
Maintenance is optional, but covers tech support and upgrades for the software. Please consider purchasing maintenance if you haven’t already. Please refer to Simple Software Maintenance Agreement for more information.
How to activate any Add-on or Upgrade to SimpleIndex?
Please refer to the Wiki Documentation for the complete Licensing & Activation reference.
SimpleIndex Add-on Option A – New SimpleIndex Installation:
If you are installing SimpleIndex on the Windows computer for the first time first download SimpleIndex from the SimpleIndex Download Page.
Once the SimpleIndex software has been downloaded install the software from the downloaded installation file.
During the installation process you will be asked to enter your Serial Code or Serial Codes.
Single Serial Code:
Multiple Serial Codes (separate with a comma):
After you have entered your Serial Code(s) click Next to move through the installation process.
Once the installation is complete you will receive the following Window:
When you click Finish you will receive the Global Settings Wizard window to configure the general settings for SimpleIndex on the installed computer.

Move through the prompts to configure the Global Settings Wizard. Once complete you will receive a confirmation that the License was properly activated before the software opens.
SimpleIndex Add-on Option B – SimpleIndex Already Installed:
If you have already installed the SimpleIndex software then all you need to do is Activate the demo.
Click the SimpleIndex icon on your desktop or from your Windows Start menu.

Once SimpleIndex is open go to the Help menu and Select Activate/Transfer License.
Enter your Serial Number into the “Enter Serial Number to Activate” field in the Activation Window.

Click the Activate button to activate the license.
You will receive a confirmation that the license was properly activated and your license type will be displayed next to the “License Type:” section of the Activation Window.
SimpleIndex Add-on Option C – SimpleIndex Installed on Computer Not Connected to the Internet:
If you have installed SimpleIndex on a computer that doesn’t have an internet connection an Offline Activation will need to be done.
First fully install the SimpleIndex software without activation.
Once it has been fully installed click the SimpleIndex icon on your desktop or from your Windows Start menu.

Once SimpleIndex is open go to the Help menu and select Activate/Transfer License.
Enter your Serial Number into the “Enter Serial Number to Activate” field in the Activation Window.
Click the “Offline Activation” button.
Click OK in the “SimpleIndex Offline Activation” window, which asks you to call or email for an Offline Activation.

Select the license version that you ordered in the “SimpleIndex Version” drop down.
Then either call (865) 637-8986 option 2 or email support@simpleindex.com with the Authorization Request Code. We will the provide you with the Activation Key.
Enter the Activation Key and then click the Offline Activation button.
Maintenance is optional, but covers tech support and upgrades for the software. Please consider purchasing maintenance if you haven’t already. Please refer to Simple Software Maintenance Agreement for more information.
What is Document Imaging?
Document Imaging was the more commonly used term in the early days of document scanning and OCR and refers to any system used to replicate documents used in business. It evolved from the microfilm days where it was referred to as Document Image Management.
Document Imaging allows for the scanning of paper documents, as well as the processing of files saved electronically. These files are then named and saved for later searching.
Other document imaging terms include automatic imaging software, best digital imaging software, best imaging software, desktop imaging software, digital document imaging, digital imaging software, document imaging download, document imaging PDF, document imaging processing, document imaging products, document imaging software, document imaging solution, document imaging solutions, document imaging systems, document imaging technologies, document imaging technology, document imaging tools, image to database, imaging resource, imaging scanning software, imaging software companies, imaging software download, imaging software for windows, imaging solution, scanner imaging software, scanning and imaging, scanning imaging, and software for imaging.
Advanced Custom Settings
Please refer to the Wiki Documentation for the complete Advanced Settings reference.
The following options have been provided to address specific processing scenarios. Since these are infrequently used, they are set via the registry instead of adding them to the configuration settings.
These settings are global and will affect all users and jobs on your workstation. Please contact support if you require the ability to configure any of these settings in the job settings.
To modify any of these settings, first open the registry editor. If you do not know what this means, please contact support and do not continue further. Improperly editing the registry can corrupt your operating system.
These settings are located under HKEY_LOCAL_MACHINE\Software\SimpleIndex\Misc (for 32-systems) and HKEY_LOCAL_MACHINE\Software\Wow6432Node\SimpleIndex\Misc (for 64-systems).
Create a String key using the name given on the first line and the desired value. All settings use String keys. SimpleIndex must be restarted for these changes to take effect.
ScanAdmin
0 (default) – Administrator password is not required to access scanner settings
1 – User must enter Administrator password (if set) to access scanner settings

UpperCaseFileExtensions
0 (default) – File extensions are saved in lower case (*.tif, *.pdf, etc.)
1 – File extensions are saved in upper case (*.TIF, *.PDF, etc.)
DisableMaxRecs
Some databases (such as FileMaker) do not support the MaxRecs property which limits the number of rows returned in a query.
0 (default) – Queries are limited by the value specified in Max Files/Batch
1 – All matching records will be returned by the query
StopFile
Filename for the “stop file” created during import and export process to prevent other Simple Software or custom processes from attempting to read or write to these folders at the same time. Can be modified to meet the requirements of other applications or to allow for processing a file that happens to be called “STOPFILE.TXT”.
STOPFILE.TXT (default)
StopFileAge
If a process terminates abnormally during the import or export steps, the stop file may remain in the input or output folder, preventing future batches from being processed. Value may need to be increased if processing very large batches, or it can be decreased to restart terminated jobs more quickly.
120 (default) – Stop file will be removed automatically if it is more than 120 minutes old
PDFWaitTime
Number of CPU cycles to wait before returning the cursor to the default field after loading a PDF file. Acrobat and other PDF readers automatically place the cursor in the PDF document after opening. In order to place the cursor in the default index field, the application must wait until the PDF file finishes rendering and then place the cursor back in the field. Since the load time varies based on the size of the file, network speed, etc., this value can be increased to ensure the default field is always selected after navigating PDF files.
10000 (default)
UseDBQuotes
Substitutes quotes for brackets to indicate field or table names that contain spaces when formatting queries. For compatibility with some database systems.
0 (default) – place brackets [] around field or table names with spaces
1 – place “quotes” around field or table names with spaces ResampleTIFF
0 (default) – Imported TIFFs keep their original resolution
1 – Imported TIFFs are resampled using the PDF X and Y resolution setting
DBTimeout
Allows you to modify the amount of time to wait for a database transaction before timing out. Useful when dealing with large data sets or slow network connections where the timeout occurs before the transaction is complete.
30 (default) – timeout after 30 seconds
ConvertWithXFI
Some format conversions may fail during the import step. Use this option to switch to the alternate import SDK (slightly slower) that is used when running as a server to resolve these issues.
0 (default) – Use default method for importing files
1 – Use the XFI imaging engine when importing files
UseMSWMVParser
Use this to fix issues with WMV video playback on some systems.
0 (default) – Use the default WMV playback method
1 – Use the Microsoft WMV playback method
AnnotationFont
Change the default font used for imprinting and other annotations. Indicate the font name as it appears in font selectors like the one in MS Word.
Arial (default) – Use the Arial font when imprinting or annotating
BarcodeHeight
Mimimum distance relative to height between 1D barcodes (1-10). Lower the value to find barcodes that are very narrow relative to their height.
4 (default)
DilateBarcodes
Performs a dilate on the images before attempting to read barcodes with the DTK engine. This can help with detection of barcodes when scans are very light.
0 (default) – Read original image
1 – Read original image; if no barcodes are found, dilate the imate and read again
DeleteBlankPDF
Blank page deletion does not work with PDF files that have been converted from electronic documents instead of scans. Black & White scans saved as PDF files have roughly the same file size as comparable TIFF images and the same blank page thresholds will work. If all PDFs being imported are from B&W scans, you can set this value to 1 to enable blank page deletion for these.
0 (default) – Blank page deletion will be ignored for PDF files
1 – Use the Min File Size threshold for PDF files as well as TIFF images
AutoSaveFiles
Automatically save annotations, cropping and other changes to image files when you click “Save Index”, avoiding the extra prompt.
0 (default) – Changes to files will prompt the user asking whether to save changes or not
1 – Changes to files will be saved automatically when the user clicks “Save Index”
GUIDBatchNames
When running several jobs on the same computer with a short timer interval, the date/time format of the batch names is not always unique. Use this setting to generate a GUID for the batch names that will always be unique.
0 (default) – Batch names will be formatted YYYY-MM-DD@HHMMSS
1 – Batch names will be generated with a GUID
UnsavedIndexColor
Allows you to change the default color for unsaved field values from Blue to any color you like. To set this you must get the Hexadecimal RGB value for the color you want and convert it to an Integer.
16711680 (default) – Unsaved index values will appear in Blue
Index With Non-Latin Character Sets
Please refer to the Wiki Documentation for the complete Languages reference.
By default SimpleIndex uses the ANSI character set to display and edit captured OCR data, index field values and full-text OCR. This works for all languages based on the Latin alphabet (English, French, Spanish, German, etc.)
To index documents in other languages like Chinese, Japanese, Russian, Arabic and other non-Latin alphabets, set the default character set using this registry key. If the key is not set correctly then Unicode text will show up as ??????????.
Use Notepad to edit the “Charset” value from the sample setting below and save it to a .reg file. Then double-click the .reg file to install (Administrator privileges required).
You can download the .reg file here but you still need to edit in Notepad to set the Charset value before installing.
If you are on a 32-bit operating system be sure to remove the extra “\WOW6432Node” from the registry path.
[HKEY_LOCAL_MACHINE\SOFTWARE\WOW6432Node\SimpleIndex\Misc]“Charset”=”1”
| Charset Name | Charset Value |
| ANSI_CHARSET (Latin) | 0 |
| DEFAULT_CHARSET | 1 |
| SYMBOL_CHARSET | 2 |
| SHIFTJIS_CHARSET (Japanese) | 128 |
| HANGUL_CHARSET (Korean) | 129 |
| GB2312_CHARSET (Simplified Chinese) | 134 |
| CHINESEBIG5_CHARSET (Chinese) | 136 |
| GREEK_CHARSET (Greek) | 161 |
| TURKISH_CHARSET (Turkish) | 162 |
| HEBREW_CHARSET (Hebrew) | 177 |
| ARABIC_CHARSET (Arabic) | 178 |
| BALTIC_CHARSET (Baltic) | 186 |
| RUSSIAN_CHARSET (Russian) | 204 |
| THAI_CHARSET (Thai) | 222 |
| EE_CHARSET | 238 |
| OEM_CHARSET | 255 |

The full list of values is at https://msdn.microsoft.com/en-us/library/cc194829.aspx.
Max List Size
Please refer to the Wiki Documentation for the complete File Output Settings reference.
If you have a field that has a list and it loads very slowly then the size of the list that it loads needs to be limited.
You first open the Registry or regedit. Then you find this location: Computer\HKEY_LOCAL_MACHINE\SOFTWARE\Wow6432Node\SimpleIndex\Misc
Then you right click in the space to the right and select New>String Value
Then you name this new entry this: MaxListSize
Then you double click on it and set the size of the list that it loads. We suggest somewhere between 1000 and 5000

Is SimpleIndex for Windows only? I’m a Mac user.
Please refer to the Wiki Documentation for the complete Installation reference.
Unfortunately SimpleIndex is for Windows only. This is true of most high speed document scanning applications, due to the fact that most document scanners only have Windows drivers.
However, SimpleIndex can output to databases and file shares on a Mac server. The fact that it does not have its own proprietary file system and database makes it a very good choice for Mac networks, since only the scanning workstation needs to be a PC.
Likewise, many users have reported great success running Parallels or Bootcamp on their Mac to allow the use of a Windows OS
- Published in Licensing & Installation
How much do Simple Software products cost?
Click here for the latest pricing and online ordering information. You can also purchase full service solutions from one of our Authorized Dealers.
Click here for a PDF version of the price list and a feature matrix that shows which features are included in each version.
All applications are activated online by entering a serial number in the demo. The serial is emailed to you once your order is processed.
- Published in Licensing & Installation, LoanStacker, SimpleCoversheet, SimpleExport, SimpleQB, SimpleSend, SimpleView
On what versions of Windows does SimpleIndex run?
SimpleIndex will run on Windows 11, 10, 8, 7, Vista, 2008 editions.
It would not run on Windows ME or NT.
SimpleIndex 8.3 and below are compatible with Windows XP, Server 2003 and Windows 2000.
- Published in Licensing & Installation
How do i setup Simpleindex to use a Database table field as a list file when the table is not the same as the table i am using on the Database Tab.
Please refer to the Wiki Documentation for the complete Database reference.
All you will need to do is put the table and field name you want to pull from in the Dictionary Matching & List Fields Box. It should be formatted just like the example below.
Example: Table Name|Field Name
- Published in Licensing & Installation
- 1
- 2
