SimpleSend Projects
SimpleSend projects are composed of components which encapsulate sets of files as well as the different types of file transfers. Existing projects can be opened, and new projects can be created from the File menu. Different aspects of the project may be changed by accessing the Project menu.
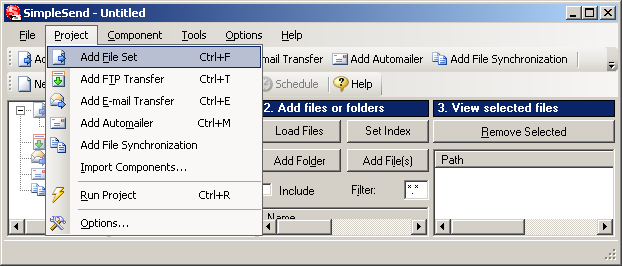
Under the Project menu you may add the various types of components to the project, import components from existing projects, run the project, and access the project’s options. As you add components to the project you will see them appear in the leftmost pane of program window.
From the Component menu one can remove previously added components, rename the currently selected component, and access the advanced options associated with each component.
The File Set Component[edit | edit source]
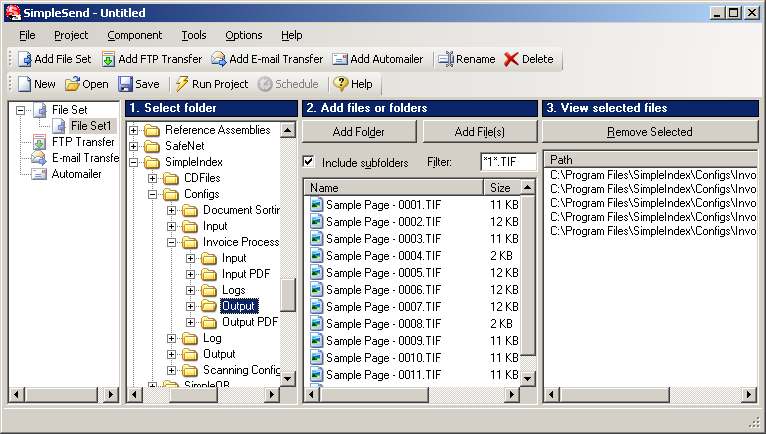
The File Set Component allows one to create a file set by selecting files and directories according to wildcard filters. First select the drive and directory that your files are in. This will populate the second list with the files in that directory. Then select the appropriate files and click Add File(s). This will add the selected files to the file set according to the wildcard that is specified in the filter. This is illustrated in the figure below where only TIFF files that have a ‘1’ in the file name are added.
It also possible to have SimpleSend add files automatically before transferring. This is accomplished with the Add Directory button. In the example above, all TIFF files in the C:\Program Files\SimpleIndex\Configs\Invoice Processing\Output directory will be added before transfer, as well as all the TIFF files in all its subdirectories because the ‘Include subfolders’ option is clicked. The recursion is denoted by a ‘/R’ in the selected files list.
The FTP Transfer Component[edit | edit source]
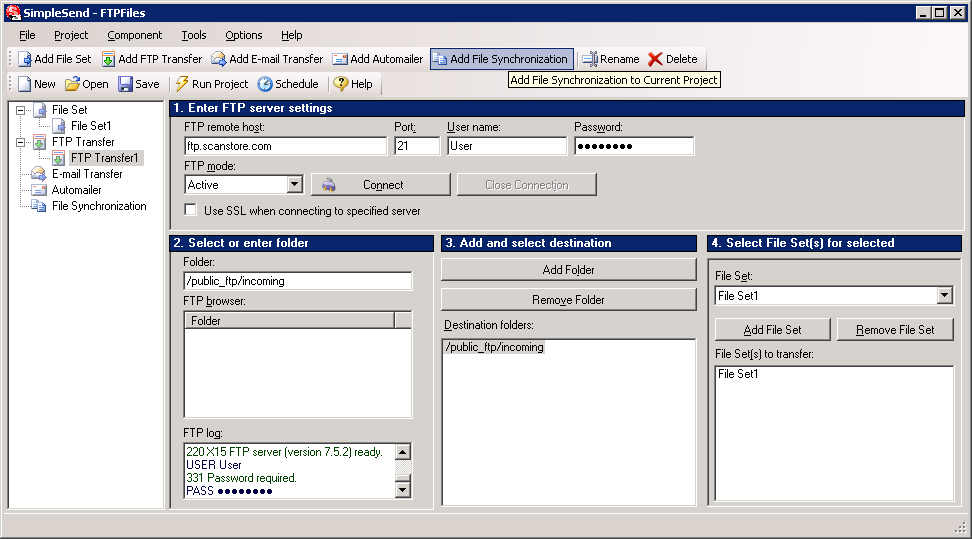
The FTP Transfer Component allows for the transfer of multiple file sets to multiple destinations on a remote server. Begin by entering the settings for the remote FTP server. Once you click Connect and you have correctly specified the settings, the program will connect to the FTP server and retrieve the directories. Note that you do not need to connect to the FTP server if you plan on manually typing in the destination directories’ names. The status and operational messages from the FTP server are displayed in the lower left corner of the window. The current directory is displayed in a box above the directory listing and can be changed by browsing the directories in the listing or by manually typing the directory name into the box. Once the desired directory has been browsed to or entered, click Add Directory to add the directory as a selected destination on the FTP server. Next you will want to select file sets to be transferred to your selected destination directory. To do this, first select the directory that you have just added. Then choose an existing file set from the drop down box and click Add File Set. In the following figure, File Set1 is set to be transferred to the /public_ftp/incoming directory on ftp.scanstore.com.
The Email Transfer Component[edit | edit source]
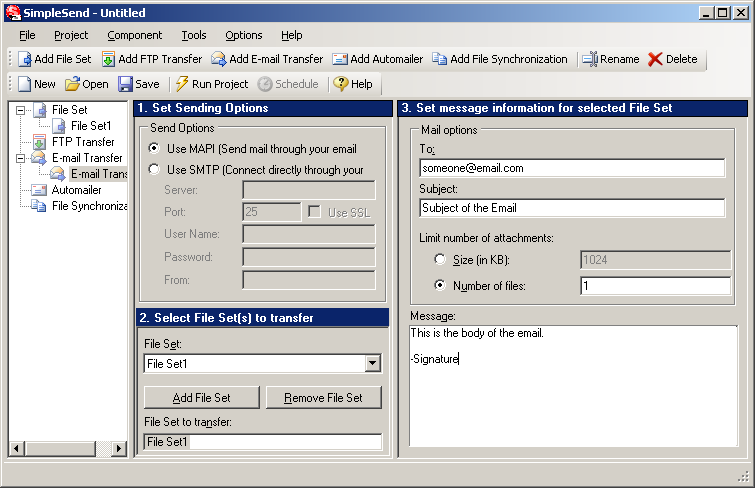
The Email Transfer Component allows for the sending of file sets via email attachments. Begin by choosing how you intend to have your emails sent. MAPI is for sending email from your desktop via your mail client. SMTP is for connecting directly to your server and should be used if you intend to run the project as a service. Then select an existing file set from the drop down box and click Add File Set to add the file set to the current email transfer. Once you have added file sets, select them in the list to view and set the email message information associated with them.
In the figure below, all files in FileSet1 have been set to be emailed to ‘someone@email.com’ with the corresponding subject and body.
You can add multiple attachments per email by setting a limit of greater than 1 on the number files, or by setting a size limit that will include multiple files. For instance, if you set the limit at 1024, and you had a file set composed of a number of 100KB files then 10 of those files would be attached to each email sent.
The Automailer Component[edit | edit source]
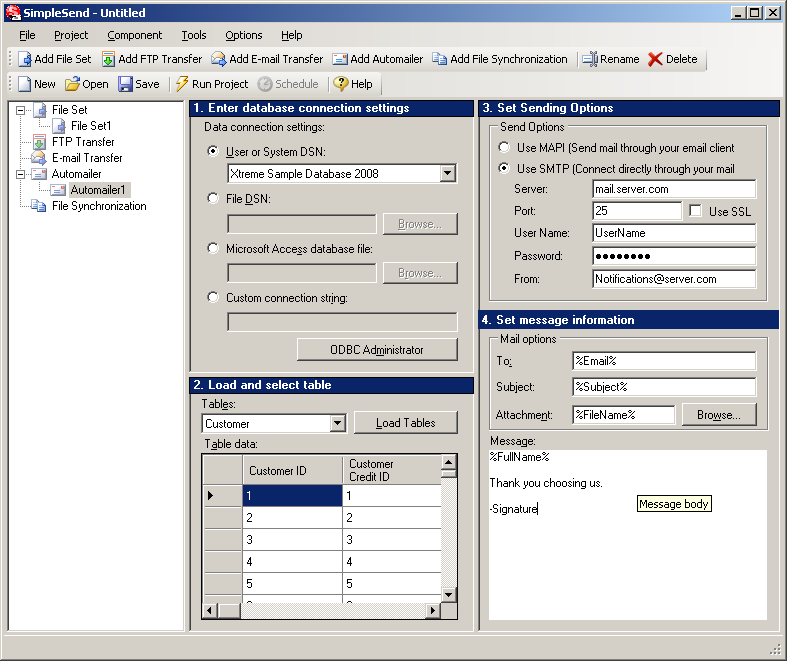
The automailer component is used to send emails and files according to records in a database. The component will attempt to send an email for each record in the table that you specify. It is assumed that at least one entry in the table will be the email address, or that you want all emails to be sent to the same address. Before sending an email, replacements are made on the text of the email according to the column names of the selected table. So, assuming the column names in the database are Email, FullName, FileName and Subject. You would most likely have %Email% in the To field of the email message information, %Subject% as the Subject, and %FileName% in the attachment field. Alternatively, if you wanted to send one file to multiple email addresses you can put the name of that file in the attachment field. You could also use %FullName% to begin the text of your email. This is illustrated in the figure below.
In addition to just normal %Replacements%, it is also possible to format dates and time. If one of the columns in your database is of the date or time type, then you can format it by using a pipe(“|”) separator and then some formatting code. For example, say the column’s name is SendDate and you wanted to only use the date, but not the time, you could use the following text to be replaced %SendDate|MM/dd/yyyy%. See Appendix A – Date and Time Formatting for available date and time formatting strings/characters.
File Synchronization Component[edit | edit source]
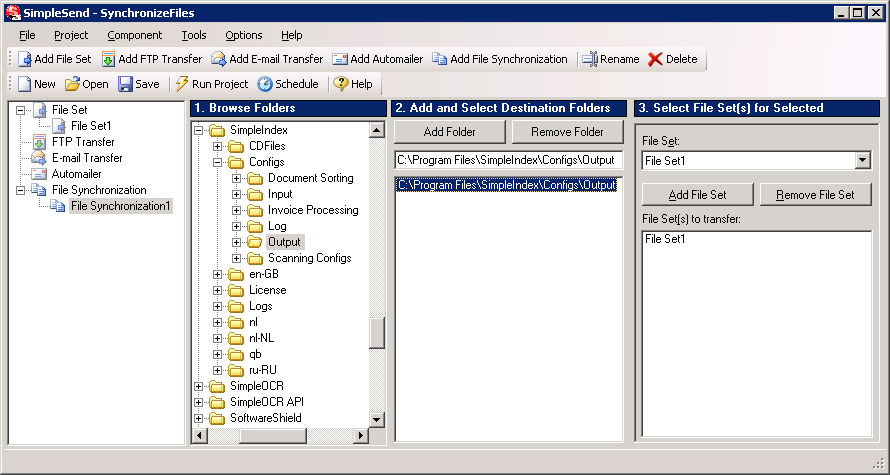
This component allows you to synchronize files between the source in a file set and a specified destination directory. Just browse to the destination folder, add it, select it, and then choose the file set that should be synchronized to it. Currently, newer files will overwrite old ones, and any files existing in the source and not in the destination, or vice-versa, will be copied as well. In the following figure, the files in C:\Program Files\SimpleIndex\Configs\Output are set to be synchronized with the folder(s) specified in File Set1.