Element Modes
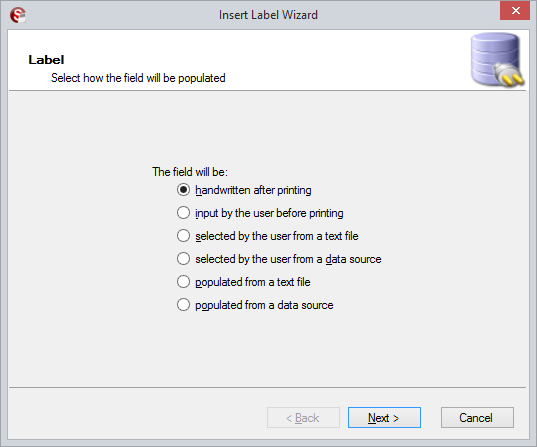
Handwritten After Printing[edit | edit source]
This option is only available for Label elements.
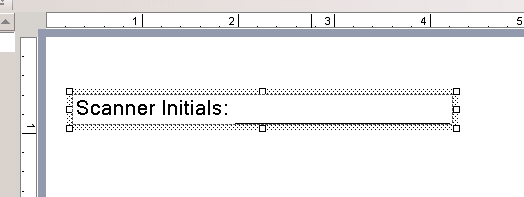
The handwritten after printing option is one of the most basic and will create labels that can be filled in by hand after the coversheet has been printed.
This is useful, for example, when wanting to do something such as having the person who scans a batch initial the coversheet.
Static[edit | edit source]
This option is only available for Barcode elements. A Static barcode will have a preset value that is coded during design time and cannot be changed by the user. This is useful for creating generic document separators that don’t contain any document metadata.
Input by the User Before Printing[edit | edit source]
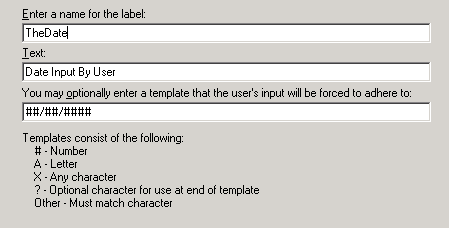
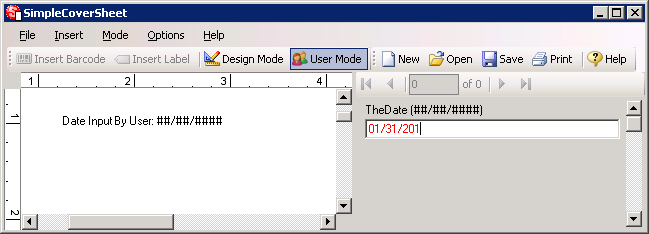
The input by the user before printing option is similar except that the value has to be entered by the user in user mode before printing the coversheet.
If the values fit a certain format that should adhered to, you can create a template for the format that will dictate valid and invalid values during user mode. If an invalid value is present the program will not allow the coversheet to be printed. So a label configured in the following manner:
Ends up behaving like this in User Mode (once the final zero is entered for 2010 the field will turn black and be accepted for printing):
Selected by the User from a Text File or Data Source[edit | edit source]
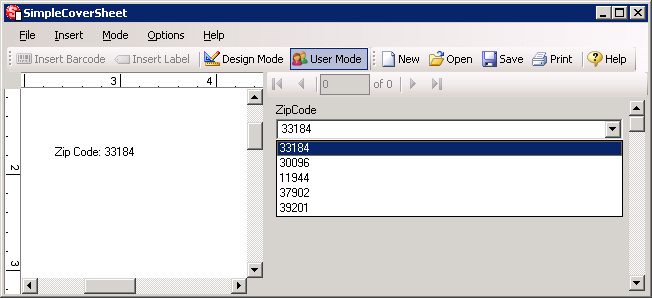
The selection types are another way of restricting the values available in user mode. For these options, during user mode, a drop down will be shown containing all the values from the specified text file or column in a Data Source.
If you want to restrict the user to only being able to use values from the list then check the option labeled Only allow values from list. Otherwise the list is basically a list of suggestions, allowing the user to select options, but also to type in a value if necessary.
If you choose to get your values from a text file, all you need to do is specify the location of the text file. The program assumes there is one option per line in the file. When using a Data Source, you will need to select the Data Source and then the column of values to use. If at the point when you need to choose a Data Source, you have not created one already, just click the Add… button next to the drop down of available Data Sources. This will bring up the Data Source configuration wizard.
Populated from a Text File or Data Source[edit | edit source]

The populated from a text file option is fairly similar to the setup for the selected from a text file option. The difference is in the behavior of the coversheet in user mode.
When a field is populated from a text file, multiple pages are created, where the different values in the file each appear on a separate coversheet page. So if you have 5 values in your text file, then you would end up with 5 coversheet pages, each one having one of the 5 values.
The number of coversheet pages in user mode can change depending on how many labels you have and how many values each of them have.
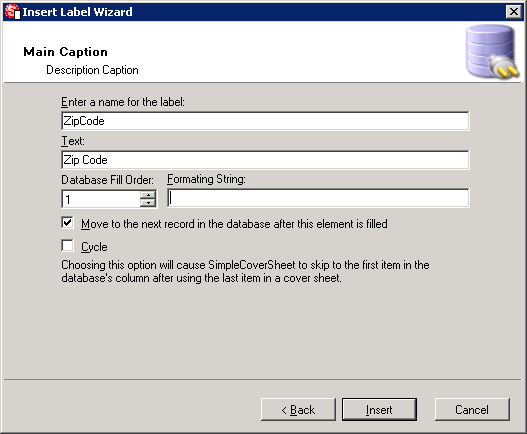
The cycle option will cause there to be an unlimited number of coversheets if there is no other element with a limited number of values. With the cycle option enabled the 5 values in a text file or Data Source column will be repeated over and over again, every 5 pages, ad infinitum, unless there is another element to limit the number of pages. This is useful for printing multiple coversheets for each record in a related dataset, such as a patient chart that has 5 standard sections that need to be divided.
When populating from a data source, the configuration is similar to the populated from a text file option, with the addition of some special functions designed for printing multiple records on one page. These are the Move to next record after element is filled and Database Fill Order properties.
The Database Fill Order property allows you to determine what order elements receive the values from the same Data Source and column. The values are positive integers (1, 2, 3, etc…) and dictate the order, where the smaller values get populated first.
The Move to next record after element is filled property tells the program to skip to the next record in the Data Source after populating the value for the element in question. It should be set on the last element of a group.
You can ignore these options when printing coversheets that only displays data from one record on each page. When printing label sheets, or any template with multiple records on a single page, Database Fill Order and Move to next record after element is filled are used to determine how the page is filled.
You can change the automatic setting for these options after all elements have been created by using the Options > Database Fill Order menu. Select One record per element to print multiple records on one page, or One record per page to print one or more columns from a single record on each page.
The Manual option should be used in cases where the automatic options are not capable of populating the data as you need.
For example, if you had a coversheet with 6 rows of information and 3 elements on each row (as in the following table). In order to group the 3 elements together, you would need to number the Database Fill Order to ensure each group is together in the sequence and every Last Name element you would need to set the Move Next Record After Fill to true.
| First Name | MI | Last Name ! |
|---|---|---|
| Darren | F | |
| Javier | V | |
| Kurt | G | |
| Julio | D | |
| Penelope | E | |
| Lance | R |
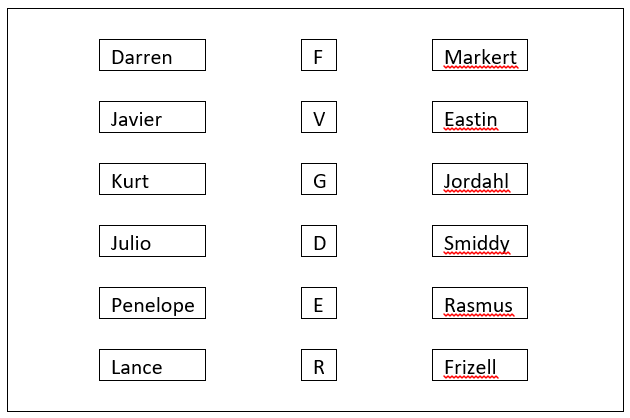
In order to get one full name per row, the elements would need to be setup as follows (assume each square is a label or barcode element):
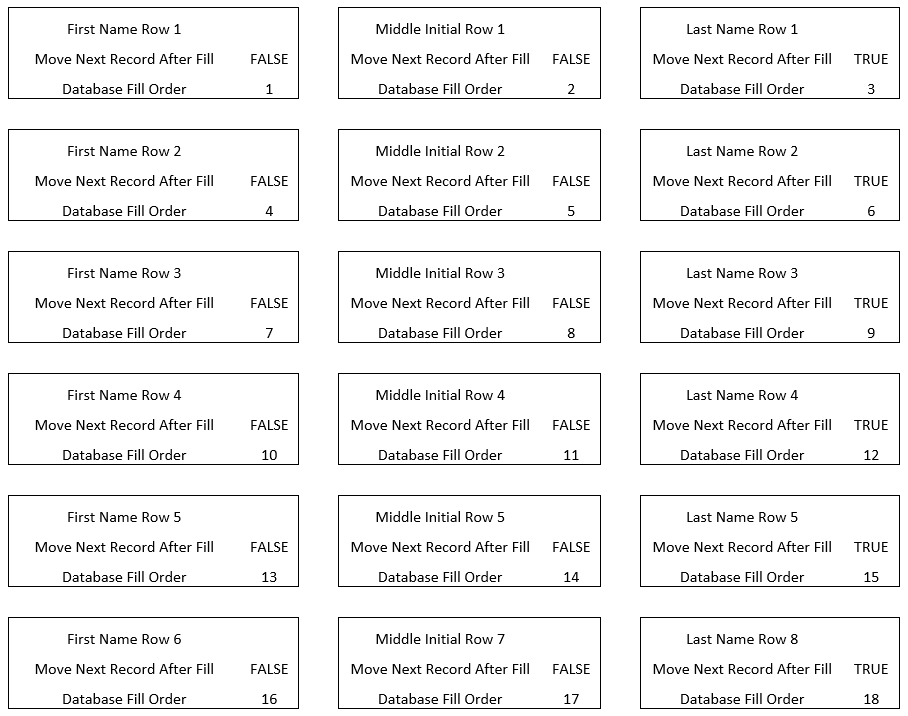
This would create a coversheet that looks similar to the following:
